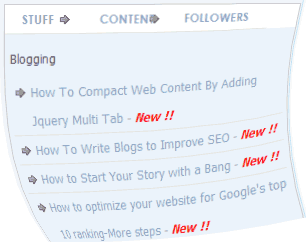
Adding tags to your blog or website not only compacts content but also makes it easier for your users to browse them. Tabs definitely helps you to use less space to show more content. It benefits both users as well as the site to compact content and present it in a nicer way. This post explained how to add beautiful multi tab for Blogger based on Jquery.
- Login to your dashboard--> layout- -> Edit HTML
- Scroll down to till you see ]]>tag
- Copy and paste below CSS code just before ]]> tag
- Scroll down and find </head> tag
- Copy and paste below code just before </head> tag
- Now add this code to your sidebar
- Now save your template and you are done
.widgets{width:100%; overflow:hidden; margin-top:5px; padding:0px 0px 0px 0px; background:#FFF; border:1px solid #ccc}.widgets a{color:#222; text-decoration:none}.widgets a:hover{color:#009; text-decoration:underline}ul.tabnav{padding:0px 0px 0px 0px; height:27px; margin:0px 0px}.tabnav li{display:inline; list-style:none; float:left; text-align:center; margin-right:4px}.tabnav li a{text-decoration:none; text-transform:uppercase; font-weight:normal; padding:5px 8px; width:90px; line-height:18px; font-weight:bold; font-family:Century gothic,Arial,sans-serif; color:#262B2F; text-decoration:none; display:block}.tabnav li a:hover, .tabnav li a:active, .tabnav li.ui-tabs-selected a{text-decoration:none; background:url(none/catm.pg) repeat-x; color:#0283C7}.tabdiv{margin-top:2px; padding:5px 5px 5px 5px; font-family: Tahoma,Georgia,Century gothic,Arial,sans-serif; background:#EBF3FB}.tabdiv a:link, .tabdiv a:visited{color:#333}.tabdiv a:hover{color:#2676A1}.tabdiv ul{list-style-type:none; margin:0px 0px; padding:0px 0px}.tabdiv ul li{height:100%; line-height:28px; padding:0px 0px 0px 0px; color:#333; border-bottom:1px dotted #61696F}.tabdiv li a:link, .tabdiv li a:visited{margin-left:5px; overflow:hidden; height:18px; line-height:24px; padding:0px 0 0px 0px; margin:3px 0px; color:#99A6AF; font-size:13px}.tabdiv li a:hover{background:url(none/la.jpg) no-repeat; color:#fff; text-decoration:none}.ui-tabs-hide{display:none}.tagcloud{width:300px; float:left; height:100%; padding:5px 15px; margin:0px 0px; background:#fff url(YOUR-IMAGE-HOSTING-LOCATION-HERE/tbody.jpg) repeat-y; font-family:Tahoma,Century gothic,verdana,Arial, sans-serif}.tagcloud a:link, .tagcloud a:visited{color:#0282D9}.tagcloud a:hover{color:#BC0C0F}
<script src="http://ajax.googleapis.com/ajax/libs/jquery/1.2.6/jquery.min.js" type="text/javascript">
<script src="http://dl.dropbox.com/u/10108777/Mall/tab/MultiTab.js" type="text/javascript">
<div class="widgets" id="tabzine">
<ul class="tabnav">
<li class="pop"><a href="http://www.blogger.com/post-create.g?blogID=7201345712579969728#popular"> Recent</a></li>
<li class="fea"><a href="http://www.blogger.com/post-create.g?blogID=7201345712579969728#tags"> Labels </a></li>
<li class="rec"><a href="http://www.blogger.com/post-create.g?blogID=7201345712579969728#recent"> Followers </a></li>
</ul>
<div class="tabdiv" id="popular">
<b:section class="tabid1" id="tabid1" showaddelement="yes"><b:widget id="HTML144" locked="false" title="Recent Post" type="HTML"></b:widget></b:section></div>
<div class="tabdiv" id="tags">
<b:section class="tabid2" id="tabid2" showaddelement="yes"><b:widget id="Label122" locked="false" title="Labels" type="Label"></b:widget></b:section></div>
<div class="tabdiv" id="recent">
<b:section class="tabid3" id="tabid3" showaddelement="yes"><b:widget id="Followers152" locked="false" title="Followers" type="Followers"></b:widget></b:section></div>
</div>
<b>Get this Widgets</b> <a href="http://mall-ware.blogspot.com" name="blogger tips and tricks" target="_BLANK">Get this MultiTab Widget</a>
You can change your Tab name (Recent Posts,Labels,Followers) what ever you want. Then place your respective codes in the Recent Posts, Labels, Followers tab.